
Kandi is a sentimental piece of jewelry to be traded or given away at parties or raves. People who do not understand the subculture involved with kandi often view it as silly, rainbow-colored jewelry that scene kids wear. In fact, it is quite the contrary. Kandi is like a tangible memory. It represents the person who gave it to you and the fun times you had the night you received it. It is to be valued, respected, and loved.
I just wanted to clear that up, for those who don't know what kandi is. Sorry for rambling. I'll start the tutorial now.
You will need...
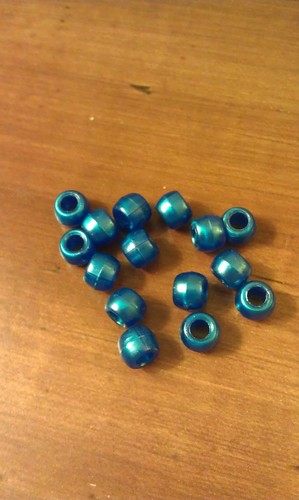 |
| 15 beads of one color (Preferably pony beads, used to make the points on the star) |
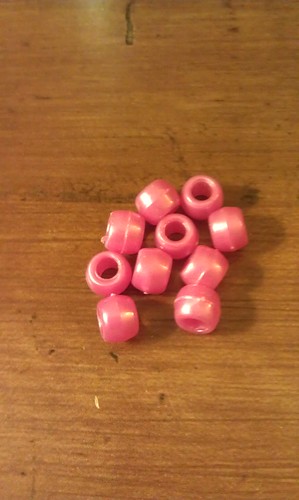 |
| 10 beads of another color (Preferably pony beads, used to make the center of the star) |
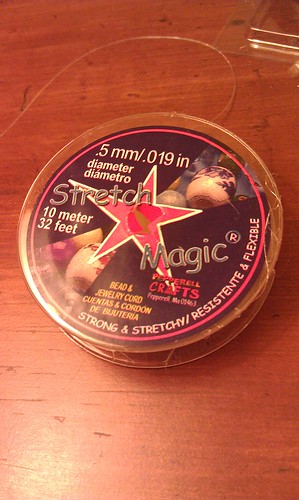 |
| Stretchy string (Preferably a whole roll) |
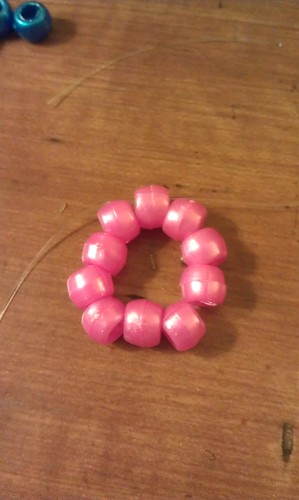
Step One
Making the Base
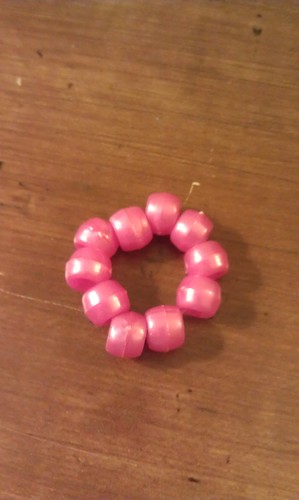
Take your roll of stretchy string and pull out a significant piece, but do not cut it. Leave it on the roll. String your 10 center beads (pink) onto the string. Tie the two ends of the string together to make a circle. It should look like the picture above, similar to a kandi single bracelet, but much smaller. Cut the remaining ends of the string off.
Step Two
Stringing Through the First Bead
Pull out another significant piece of string from the roll, and once again, don't cut it. Slide one end of the string through a bead of your choice on the circle. Make sure you are only stringing through one bead.
Step Three
Preparing the First Point
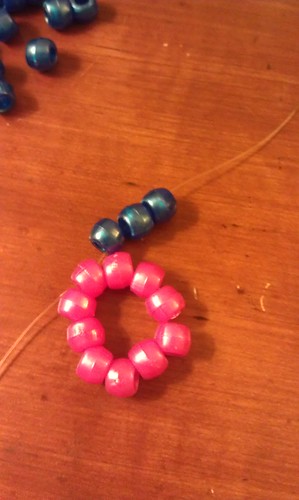
String three of your point beads (blue) onto the open end of the string, with the open end of the string still through the initial center bead.
Step Four
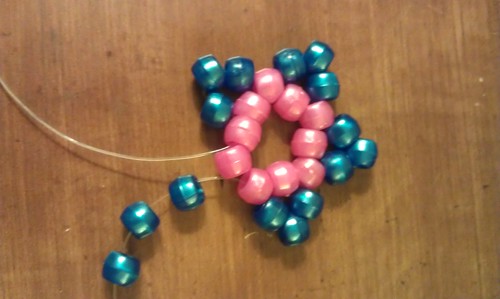
Making the First Point
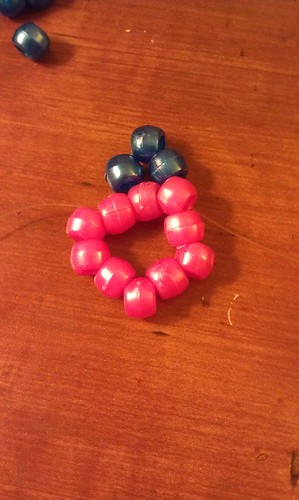
Skip a bead after the initial center bead and slide your string through the third center bead in whichever direction you choose. As you can see in my picture, I went clockwise, but it doesn't make a difference either way. Pull the string tight, and your star should resemble the picture above. If it doesn't, go back and check to make sure you strung through the third bead instead of the second or the fourth. This is very important.
Step Five
Repeat!
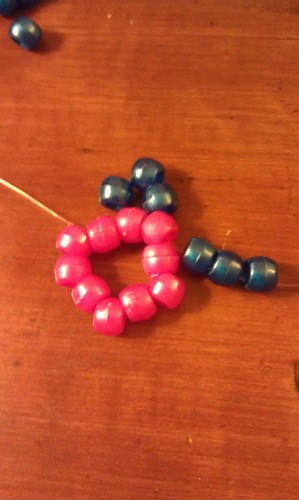
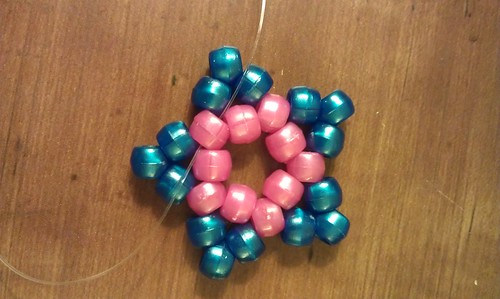
Repeat steps three and four until you have four points on the star, making sure to skip a bead each time you string a new point. If it starts to look funny, go back and check your work for mistakes to save time later.
Now, your star should look something like this...
Step Six
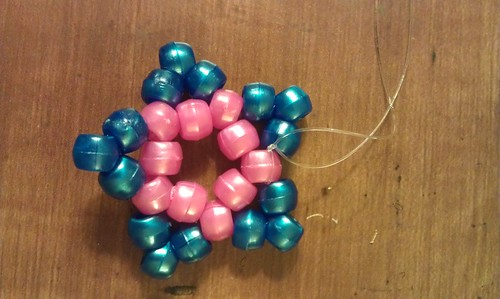
Completing the Star
The last bead might be somewhat difficult to string through if you have two loose ends of string. However, you shouldn't disrupt your star if one of your ends is still on the roll. The key is to slide your working end of string through the final bead, where the two ends of string should cross. Once you do that, your star should look like the picture above. If it doesn't, go back and check your work.
Step Seven
Tying the Knot
If one of the ends of your string is still on the roll, cut it at a place that will leave enough string for you to tie a knot. Then, take both loose ends of your string, and knot it extremely tightly. I recommend knotting it several times to make sure it doesn't come undone. Cut any remaining ends of the tied string, and you're done!
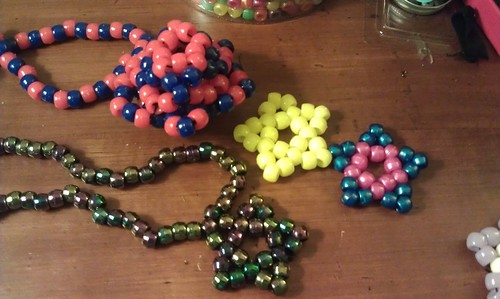
There are endless possibilities when it comes kandi stars and kandi in general. As you can see in the picture above, you can easily string a kandi star onto a necklace. You can also glue it to headbands, hair clips, keychains, or anything you like! The monstrous-looking thing in the upper left corner of the picture is a 3D kandi star, which I might make a tutorial on in the future. I personally prefer the 2D stars, but the 3D ones are super cool as well.
I hope this tutorial worked for you, and thanks so much for reading!


0 comments:
Post a Comment