CLICK HERE FOR BLOGGER TEMPLATES AND MYSPACE LAYOUTS »

Sunday 24 June 2012

Be Happy. :D

Life can be rough. It will throw all kinds of problems at you, sometimes all at once. Things can feel as if they're getting out of control. You can feel as if you're getting out of control.

But you know what? You are beautiful. You are special and unique in your own wonderful ways. You, alone, are powerful enough to make it through anything life throws at you. Trust me on this. I am living proof.

Happiness can seem so far away when you're lonely, depressed, or feeling worthless. The key is to remind yourself that no matter what your parents, siblings, bullies at school, friends, or other troubled individuals say, you have a purpose in this world. You are a unique person with unique thoughts, feelings, desires, and beliefs. No one is alike. Therefore, one person cannot be compared to another. No one can tell you who you are or who you will be. Only you can decide that. You have the power to change everything.

Think of life as a house. If you run into a problem, there is always a back door to take out of that problem. That back door might not always be easy to take, and it might turn your whole entire world upside down. However, if the problem is significantly harming your life, that door is probably worthwhile to take. In these situations, courage is an essential virtue, and you will definitely be rewarded for it in the end.

The most important thing to remember is that you are you, and no one else. You have a purpose in this world. You belong here. You have your own uniqueness to contribute to the billions of other people in the world. Without the endless diversity of thoughts, beliefs, and ideals, our world would be one monotonous collection of proselytized individuals. It's the diversity that causes people to come up with brilliant ideas that advance our culture. Racial, sexual, and religious tolerance would not have occurred without the brave people who were willing to rise against the status quo and make a difference. Unique people just like you and me are the people who advance society and make the world a better place.

If people are bullying you or purposefully hurting you, then believe me, they are beneath you. The truth is, they are just insecure. A confident, happy person would have no reason to waste his or her life putting other people down. Bullies are weak, insecure, and often unhappy people. Just keep this in mind whenever dealing with them.

Loneliness is a feeling that almost everyone experiences at some point in life. Feeling unloved or alone in can be extremely discouraging and painful. One thing to remember about loneliness is that you can't be unloved if you love yourself. So, please, love yourself for who you are, even if others aren't as appreciative of your beauty and worth. Just because "society" or "the media" disapproves of the way you live your life does not mean that you are any less important than anyone else in the world. Everyone is equal, and everyone has something to contribute.

On that note, please be happy. I'm sure you've heard the quote, "Every 60 seconds you spend upset is a minute of happiness you'll never get back." It's so true. Live a happy life. Laugh, smile, be crazy, and don't care what other people say or think of you. The good memories you made being happy will be worth it in the end.

Things do get better. But they'll only get better if you make them.

Tutorial: How to Cut Band T-Shirt Necklines

All right. I'll be brutally honest when I say that I hate crew necklines on t-shirts or just women's shirts in general. It doesn't look flattering to me, or more importantly, on me. However, I have a genuine love for music, and it seems like most music-related shirts these days have crew necklines. Therefore, I decided to start modifying my shirts.

Cutting the necklines of t-shirts is extremely easy, and anyone can do it. Sewing isn't required, but I prefer to sew the necklines up afterwards to prevent fraying in the wash. Alternatively, stretching the neckline right after cutting causes the fabric to curl under and give it that "intentionally messy" look. This can also prevent fraying.

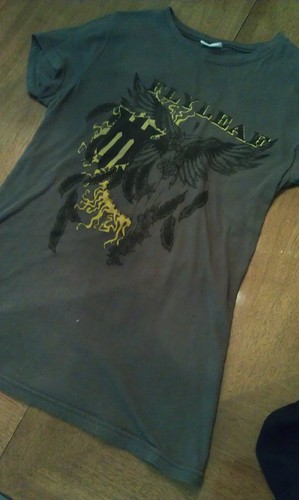
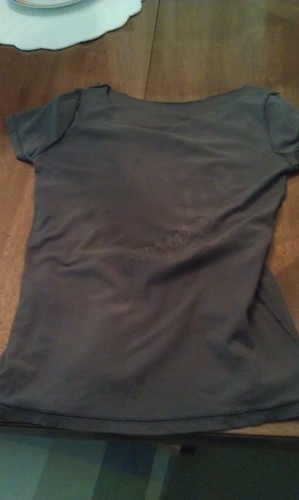
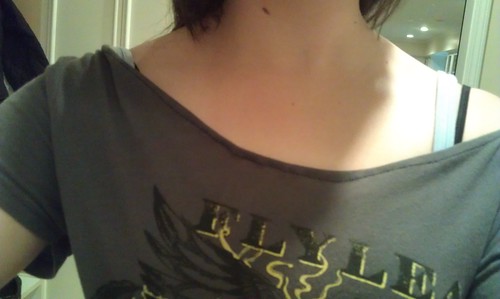
In this tutorial, I will be using my old Flyleaf t-shirt as shown in the picture at the right. Please note that this method does not work well with certain fabrics, but standard cotton t-shirts should be fine.


You Will Need...

A t-shirt. (Shown above)


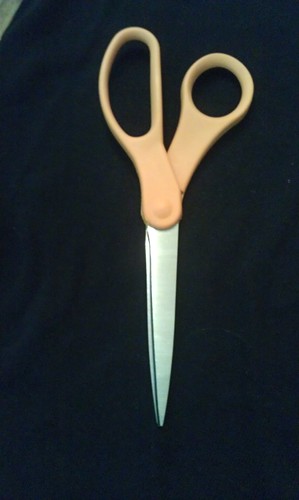
A pair of working scissors
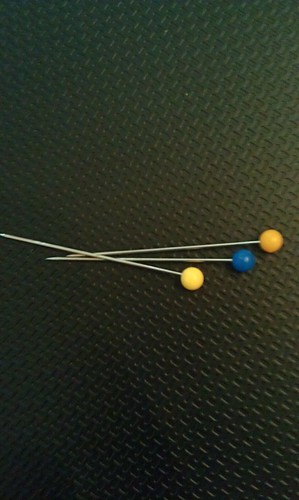
Pins (optional, to be used if sewing)


A sewing machine (optional)


Step One

Preparing the Shirt


Make sure the t-shirt is on a completely flattened surface. A table, large desk, or even a hard floor are sufficient. Ensure that the seams on the shirt are lined up and that it is lying completely flat, or else your cuts might not be accurate.


Step Two

Beginning to Cut


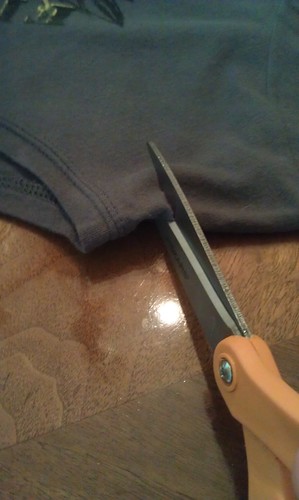
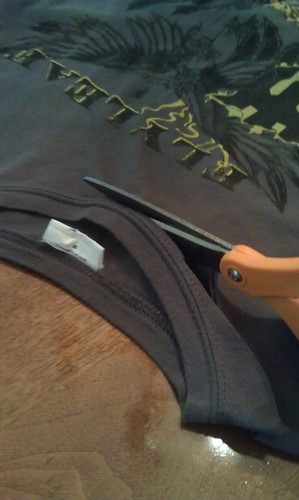
Begin cutting about an inch from the neckline. Using this measurement will create an off-the-shoulder style shirt. If you want it to cover more skin, then you can start closer to the neckline. Take your time when deciding how much to cut. Adding fabric back to a shirt is much more difficult than taking more off.


Step Three

Cutting to the Center


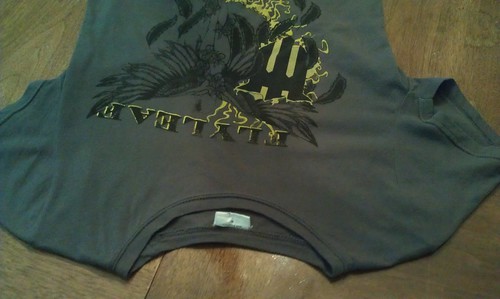
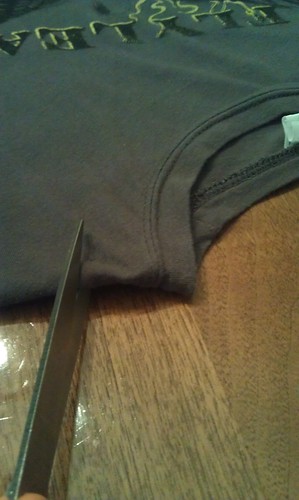
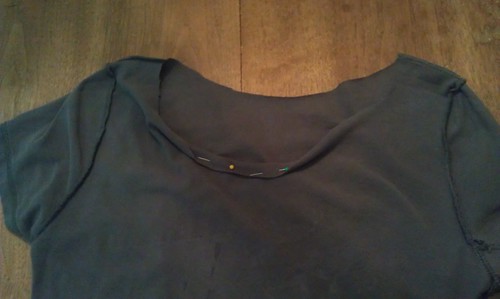
Make your way to the center with the scissors, trying to make your cuts as accurate as possible. I don't cut my shirts an inch from the neckline all the way around. Instead, I try to get my scissors closer to the neckline when I reach the center, as shown in the picture above. That's just my personal method, though. It's fun to experiment with different styles, so don't be afraid to try something unique.

Step Four

Cutting the Other Side


When you reach the middle, stop and go to the other side. Start about an inch from the neckline, and repeat what you just did in the last two steps so you meet your first cut in the center. 


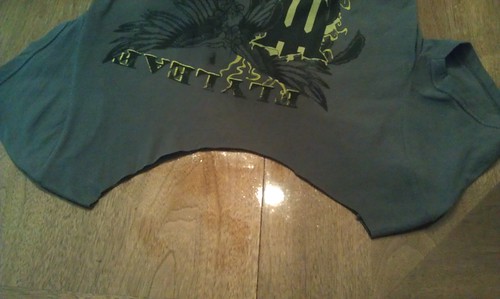
Now, your shirt should look something like this.


 If your shirt doesn't look even, don't worry! Just take a little off gradually with the scissors until you like the way it looks.

If you aren't going to sew your neckline, all you have to do now is stretch out the fabric near the neckline to make it curl under, and then you're done. If you want to sew it, keep reading.

Step Five

Preparing to Pin


Turn your t-shirt inside out. This will make it easier to pin and sew.

Step Six

Pinning the Neckline


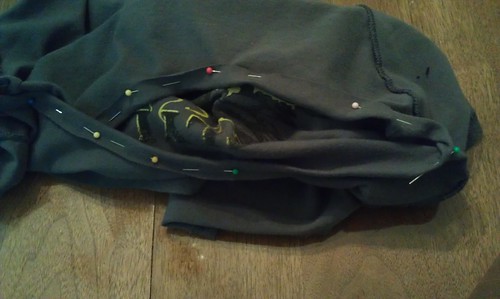
With your shirt still inside out, begin turning the neckline under about half an inch to an inch, and pin it to secure it. Pinning isn't necessarily required, but it makes sewing much easier and it helps to ensure that your neckline is as even as possible. Continue to pin the neckline in this fashion all the way around the shirt. Check to make sure that it looks good and is fairly even.

Step Seven

Sewing the Neckline


I am not by any means an expert seamstress, so I don't have much advice to give when it comes to sewing. Just make sure that even though your shirt is inside out, you are sewing the top part of the stitch (the pretty side) on the front of the shirt. Pick a stitch on your sewing machine that works well with the fabric you're sewing. Try to match the color of your thread with the color of your shirt. I didn't have any dark gray thread while I was making this tutorial, so I had to settle for black. You don't have to match the color if the clash doesn't bother you, but mistakes are easier to hide if the thread matches the fabric.


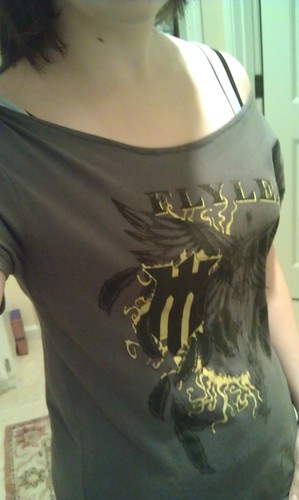
Here are some pictures of the finished product. Please disregard my mediocre sewing.


I hope you enjoyed this, and thanks so much for reading! :3


Tutorial: How to Make a 2D Kandi Star


Kandi is a sentimental piece of jewelry to be traded or given away at parties or raves. People who do not understand the subculture involved with kandi often view it as silly, rainbow-colored jewelry that scene kids wear. In fact, it is quite the contrary. Kandi is like a tangible memory. It represents the person who gave it to you and the fun times you had the night you received it. It is to be valued, respected, and loved.

I just wanted to clear that up, for those who don't know what kandi is. Sorry for rambling. I'll start the tutorial now.


You will need...


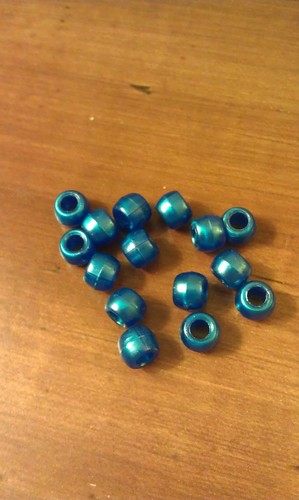
15 beads of one color
(Preferably pony beads,
used to make the points
on the star)
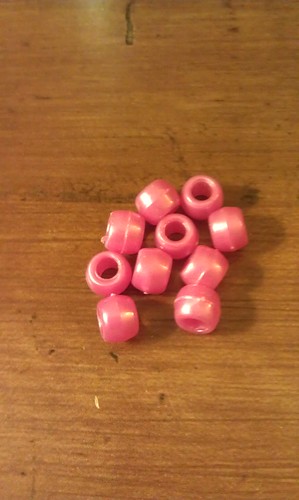
10 beads of another color
(Preferably pony beads,
used to make the center
of the star)


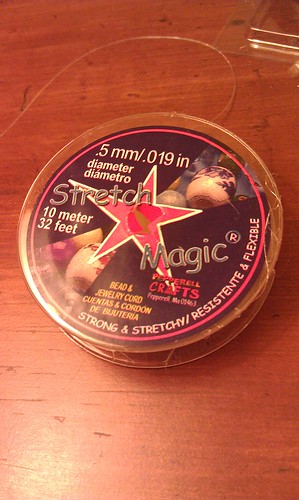
Stretchy string
(Preferably a whole
roll)


Step One

Making the Base


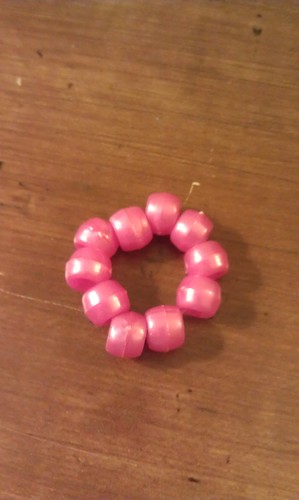
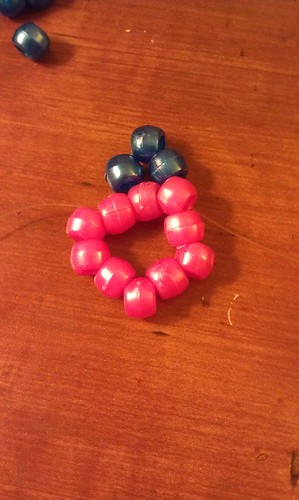
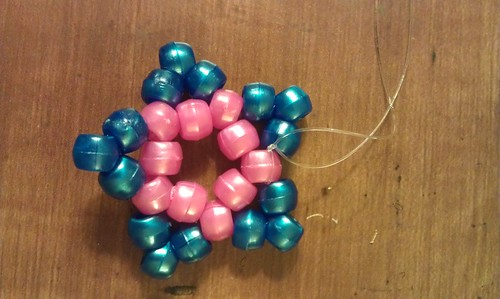
Take your roll of stretchy string and pull out a significant piece, but do not cut it. Leave it on the roll. String your 10 center beads (pink) onto the string. Tie the two ends of the string together to make a circle. It should look like the picture above, similar to a kandi single bracelet, but much smaller. Cut the remaining ends of the string off.


Step Two

Stringing Through the First Bead


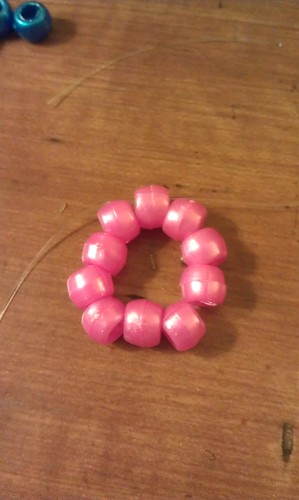
Pull out another significant piece of string from the roll, and once again, don't cut it. Slide one end of the string through a bead of your choice on the circle. Make sure you are only stringing through one bead.


Step Three

Preparing the First Point


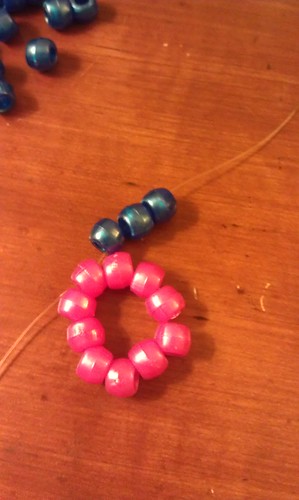
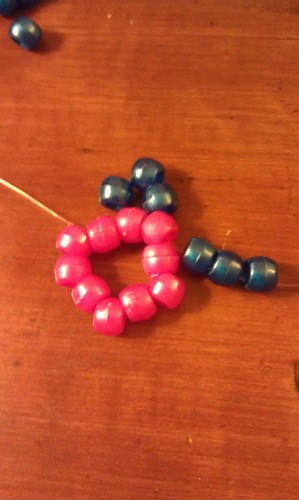
String three of your point beads (blue) onto the open end of the string, with the open end of the string still through the initial center bead.


Step Four

Making the First Point


Skip a bead after the initial center bead and slide your string through the third center bead in whichever direction you choose. As you can see in my picture, I went clockwise, but it doesn't make a difference either way. Pull the string tight, and your star should resemble the picture above. If it doesn't, go back and check to make sure you strung through the third bead instead of the second or the fourth. This is very important.


 Step Five

Repeat!


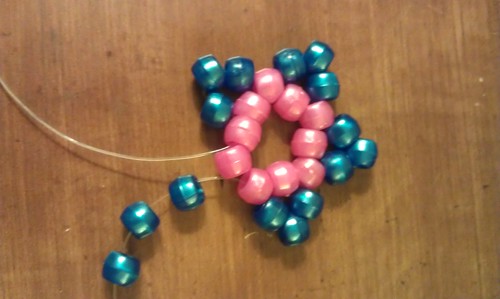
 Repeat steps three and four until you have four points on the star, making sure to skip a bead each time you string a new point. If it starts to look funny, go back and check your work for mistakes to save time later.


Now, your star should look something like this...


 Step Six

Completing the Star


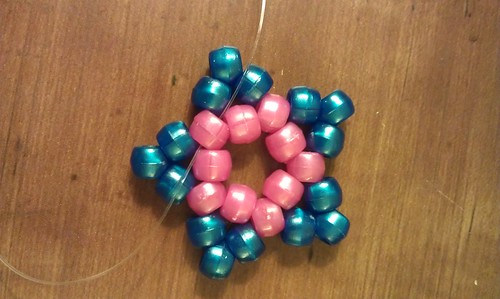
The last bead might be somewhat difficult to string through if you have two loose ends of string. However, you shouldn't disrupt your star if one of your ends is still on the roll. The key is to slide your working end of string through the final bead, where the two ends of string should cross. Once you do that, your star should look like the picture above. If it doesn't, go back and check your work.


Step Seven

Tying the Knot


If one of the ends of your string is still on the roll, cut it at a place that will leave enough string for you to tie a knot. Then, take both loose ends of your string, and knot it extremely tightly. I recommend knotting it several times to make sure it doesn't come undone. Cut any remaining ends of the tied string, and you're done!


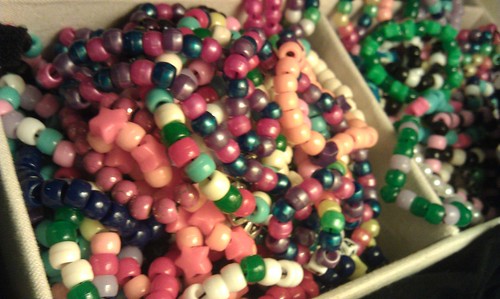
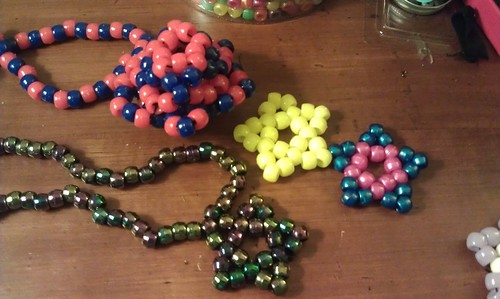
There are endless possibilities when it comes kandi stars and kandi in general. As you can see in the picture above, you can easily string a kandi star onto a necklace. You can also glue it to headbands, hair clips, keychains, or anything you like! The monstrous-looking thing in the upper left corner of the picture is a 3D kandi star, which I might make a tutorial on in the future. I personally prefer the 2D stars, but the 3D ones are super cool as well.

I hope this tutorial worked for you, and thanks so much for reading!


Friday 22 June 2012

Mall Haul (Hot Topic, Charlotte Russe, rue21, and SHOES)

I figured that rather than writing a long, boring introductory post, I would begin my blog with a decently sized haul. However, I would advise you to check out the other pages if you want to learn more about what this blog is going to be about.

All right! So, I went to the mall today. The main reason I went was because I knew Hot Topic was having their big "Hot Mess" sale, and I wanted to see if they had any reasonably priced items before everything sold out. I did end up visiting Charlotte Russe, rue21, and a local shoe store afterwards, though. The items below are what I bought and the prices I bought them for. (Please note that many of the items I bought were on sale/clearance and the prices may vary in the stores you go to.) I'll try to provide the exact item name, though in some cases I may not be able to.

Hot Topic

Hot Topic was the first place I went. I bought two t-shirts, two dresses, a necklace, and a pair of thigh-high tights. They were all on sale, so many of the items were very low-priced.


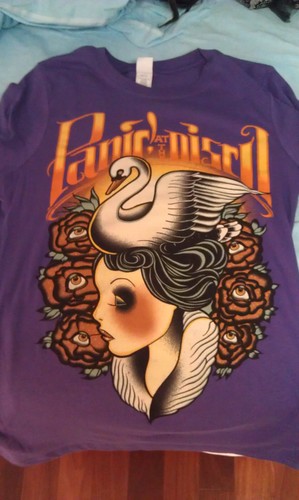
Panic! at the Disco t-shirt
$4.99
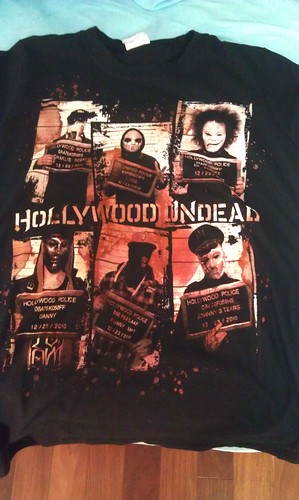
Hollywood Undead t-shirt
$4.99


I will be modifying these t-shirts because I am not a fan of crew necks. I always cut the neckline off all my band t-shirts and sew them back up. I'll post a tutorial on how to do this once I get around to modifying these. The Hollywood Undead one fits perfectly, but the Panic! shirt is a bit large. I may end up doing something funky to the sides of it to make it fit more tightly.


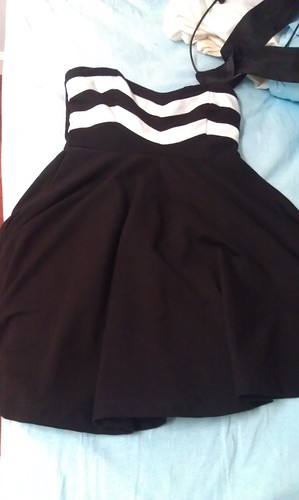
Chevron Tube Dress
$9.99


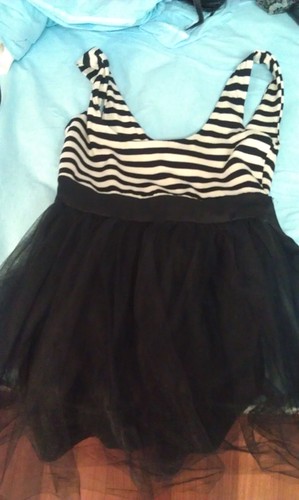
Tutu Stripe Dress
$9.99


I adore the Chevron Tube Dress. It is very form-fitting around the waist and bust, which I am a fan of, because I have a relatively small waist that I like to be very defined. It is a very cute, flattering, comfortable dress. It's also not too tight around the arms, which is something that I find to be annoying about many tube dresses.

The Tutu Stripe Dress, however, isn't quite as flattering. It kind of makes me look like a fairy because the lace poofs out A LOT. It reminds me of a goth Disney princess. Or a fairy. Whichever you prefer. It is very cute, though, which is why I bought it, and I more than likely will use it for a costume or some sort of special event in the future.


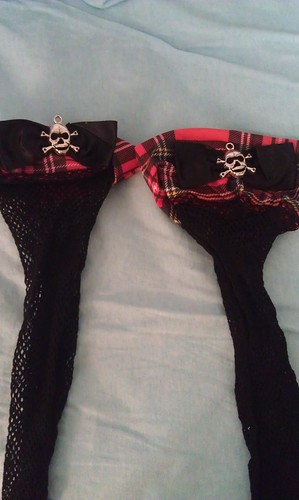
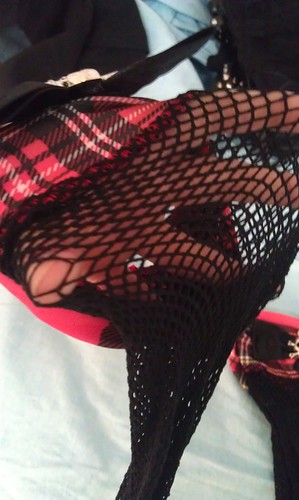
Skull Red Plaid Thigh-Highs
$4.99
Skull Red Plaid Thigh-Highs
(Continued)


I really like these tights. They're basically thigh-high fishnets with a red plaid trim and skull embellishments. I plan on wearing these a lot in the future. The second picture is just to show the fishnet texture of the tights.


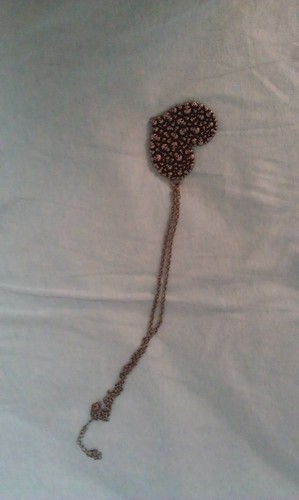
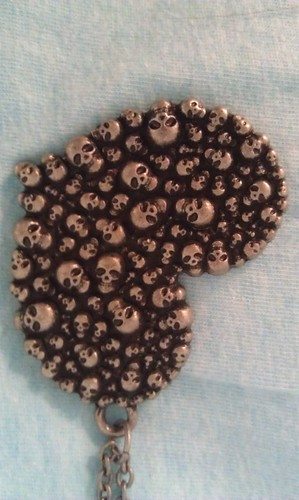
Skull Heart Necklace
$3.99
Skull Heart Necklace
(Continued)


I only bought this necklace because it was on clearance and I thought it was cute. The chain will probably break because Hot Topic's accessories are generally of dodgy quality, but I'll probably just replace the chain and continue to wear the necklace if that happens. The second picture shows the skull-infested texture of the necklace.


Charlotte Russe

I originally was not going to go in Charlotte Russe because of time constraints and monetary constraints. However, I saw one dress in the window, and LOVED IT. When I say I love something, I'm not using that phrase lightly. I had to buy it, and luckily it was at a reasonable price.

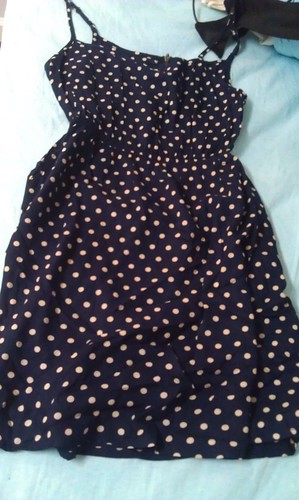
Navy Polka Dot Dress
$19.99
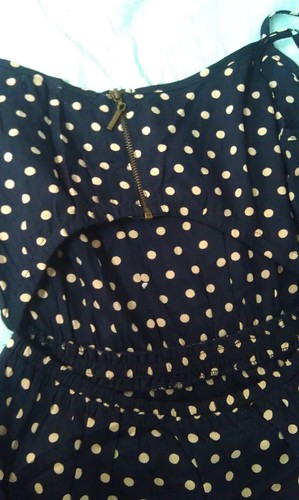
Navy Polka Dot Dress
(Back)


The lighting of the picture isn't the greatest, but the dots are actually a beige color rather than white. Also, it may be difficult to see the back, but there is a zipper for a tighter fit, and a horizontal oval-shaped cutout right under where the bra strap would be. This makes it easy to wear with either a regular bra or a strapless bra. Very convenient. It also fits well, which is a plus for me.


rue21


At rue21, I managed to pick up a tube top, a tank top, a pair of sandals, and a skirt.

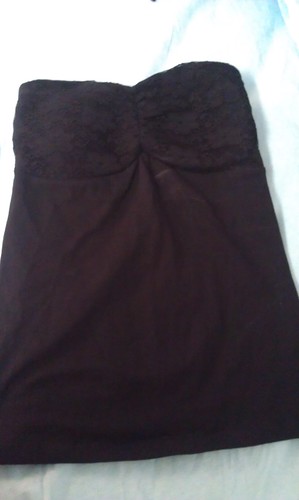
Black Lace Tube Top
$4.99

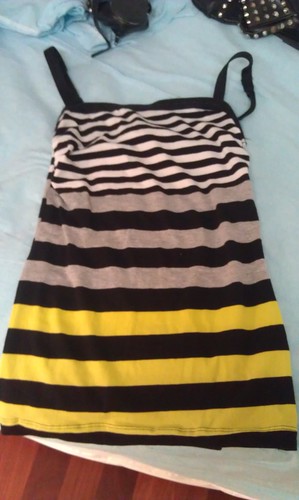
Black and Yellow Stripe Tank Top
$2.99


This tube top is very form-fitting and, if you can't see clearly, has cute lace detailing around the bust. It's a very simple, yet effective, garment. It came in several other colors, but if you can't already tell, black is most definitely my favorite color.

I picked up the tank top just because I thought it was cute. It fits well, though at first I thought it would be too tight because of its initial tiny appearance. However, the material is very stretchy, so it can fit many sizes.


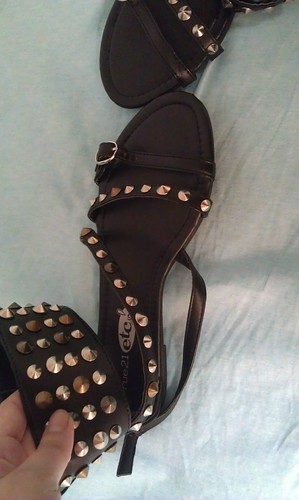
rue21 etc! Studded Sandals
$24.99
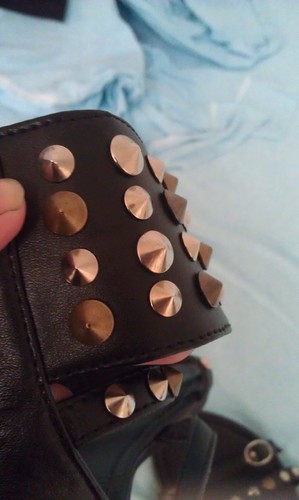
rue21 etc! Studded Sandals
(Cont.)


I loved these sandals from first sight. I admit, after trying them on, they are not the most comfortable shoes I have ever worn. They look amazing, though. As shown in the second picture, the studded detailing on these shoes is beautiful. This is definitely one of my favorite pairs of shoes, even though they sacrifice comfort for awesomeness.


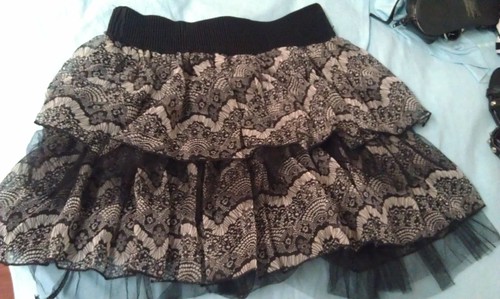
Black Lace Skirt
$19.99


Yes, yes, I KNOW, MOTHER. $19.99 for a petty skirt is somewhat expensive. This skirt is absolutely adorable, though, and it fits extremely well. I recommend it. It also looks great with the tube top shown earlier. I might possibly make a goth-inspired outfit post using these items because they work so well together. We shall see. Either way, I will enjoy wearing this skirt.


SHOES

I had money left over, so I bought three pairs of shoes. (All on sale, mwahaha)


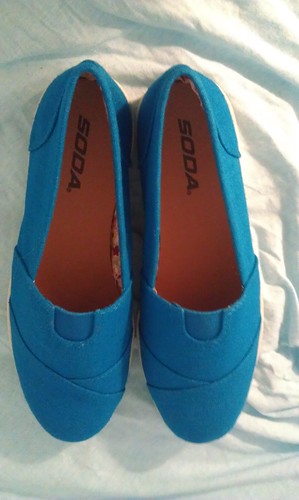
Soda Turquoise "Object" Flats
$19.99
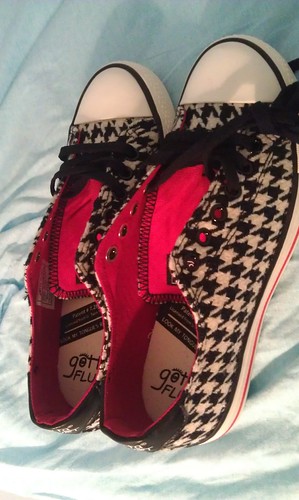
Gotta Flurt Houndstooth Sneakers
$29.99


I loved the color of the Soda flats, so I decided to get them. :3
There were a couple of things I liked about the sneakers. The houndstooth print is definitely eye-catching, but the really cool thing about these shoes is that the tongue is reversible. One side is red, and the other side is also houndstooth print, matching the rest of the shoe. These sneakers also came with both black and off-white shoelaces, so you can decide which color you want. Very convenient!


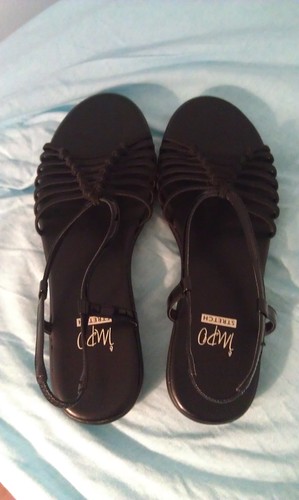
Black Woven Sandals
$19.99


All right, last pair. These just caught my eye and I thought they were cute. They run super small though, so I had to get them a size and a half larger than what I would normally wear.


That's it for my first haul! I hope you enjoyed reading, and I'm planning to make more posts, hopefully some tutorials, very soon! Thanks for reading!